Contents
After flooding, you need to understand the essential steps in the mold removal process to protect your home. First, you’ll assess the water damage and identify areas where mold might thrive. Containment is crucial to stop spores from spreading, and that often means removing contaminated materials like drywall and carpets. Once you’ve cleaned and disinfected the surfaces, you’ll want to think about how to prevent future issues. But what specific measures can you take to ensure your space remains mold-free?
Key Takeaways
- Promptly assess the extent of water damage and identify the source of flooding to determine appropriate mold removal actions.
- Contain affected areas by sealing off zones to prevent mold spores from spreading during the removal process.
- Remove contaminated materials such as drywall and carpet, wearing protective gear to ensure safety during disposal.
- Clean and disinfect surfaces using EPA-approved solutions, allowing sufficient time for disinfectants to be effective.
- Maintain humidity levels below 60% after removal to prevent future mold growth and conduct regular inspections for leaks.
Assessing Water Damage
After flooding, it’s crucial to promptly assess water damage to determine the extent of the issue. Begin by identifying the water source, as this will guide your damage assessment. Was the water from a natural disaster, a broken pipe, or a sewage backup? Each source poses different risks and requires specific remediation strategies.
Next, check the affected areas methodically. Start with the most vulnerable spots, such as basements, crawl spaces, and around windows. Look for signs of water intrusion, including discoloration on walls and ceilings, warped flooring, or bubbling paint.
Pay attention to hidden areas, like behind appliances and inside cabinets, where water may have pooled unnoticed. Document your findings by taking photos and making notes. This creates a record that can be invaluable for insurance claims and future reference.
Measure the moisture levels using a moisture meter, and assess the structure’s integrity. If you find extensive damage, it might be necessary to consult professionals for a more thorough evaluation.
Throughout this process, maintain clear communication with anyone involved, whether it’s your family or a restoration team. Letting others know what you’re discovering fosters teamwork and transparency, which can alleviate stress during this challenging time.
Identifying Mold Growth
To identify mold growth, you need to look for specific signs, such as discoloration on surfaces and a musty odor.
Common types of mold include black mold, Aspergillus, and Penicillium, each posing different health risks.
Understanding the risk factors for mold growth, like moisture levels and temperature, is essential for effective prevention and remediation.
Signs of Mold Infestation
Mold infestation can quickly become a serious issue in flooded areas, making it crucial to identify its signs early. Recognizing mold symptoms not only helps in addressing the problem promptly but also aids in mold prevention.
Here are three key indicators to watch for:
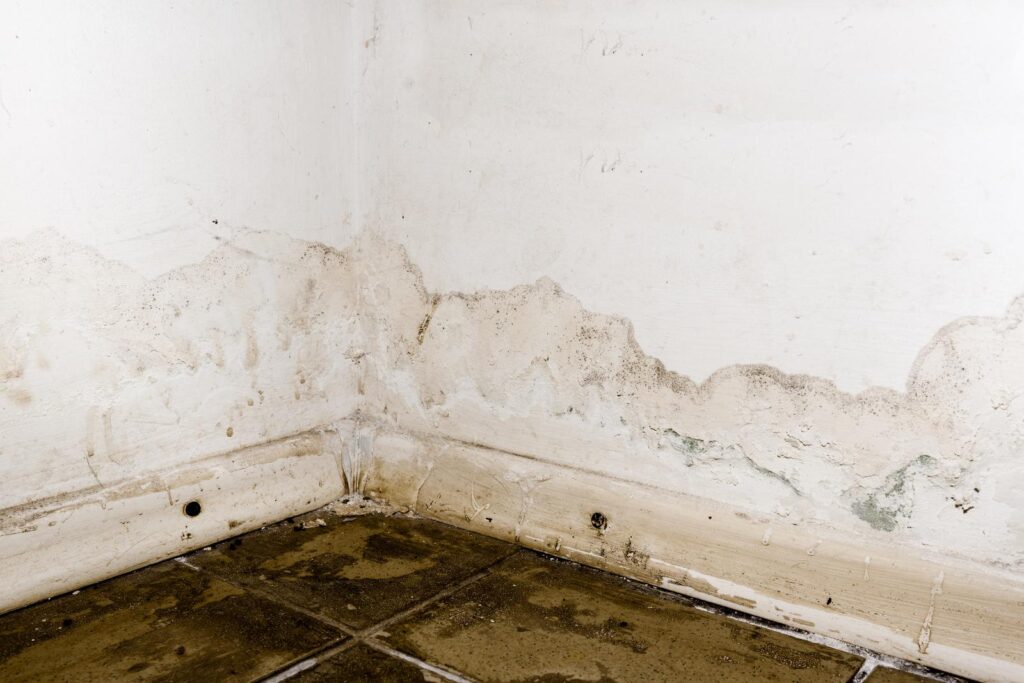
Visible Mold Growth: Look for patches of mold on walls, ceilings, and floors. They can appear in various colors, including black, green, or white.
Musty Odor: A persistent, unpleasant smell often signals hidden mold. If you notice this odor, it’s essential to investigate further.
Water Damage: Check for signs of water damage, such as discoloration, peeling paint, or warped surfaces. These conditions create an ideal environment for mold growth.
If you observe any of these signs, it’s imperative to act quickly. Ignoring mold symptoms can lead to more extensive damage and health issues.
Common Mold Types
Identifying the types of mold present in your home is essential for effective remediation and prevention. There are several common mold types you might encounter, each with distinct characteristics.
One of the most notorious is black mold, scientifically known as Stachybotrys chartarum. This toxic mold thrives in damp, humid environments and can pose serious health risks if left untreated.
Another common type is Aspergillus, which can appear in various colors, including green and yellow. While not all Aspergillus species are harmful, some can produce mycotoxins that may lead to respiratory issues and allergic reactions.
Cladosporium is another mold type you might find; it typically grows on damp surfaces and can cause allergic responses.
Penicillium is also prevalent in water-damaged areas, often appearing blue or green. Although it’s primarily known for its use in antibiotics, certain species can lead to health complications.
Risk Factors for Growth
After understanding the common types of mold that can invade your home, it’s important to recognize the risk factors that contribute to mold growth.
Mold thrives in specific conditions, and knowing these can help you protect your space. Here are three key factors to consider:
Humidity Levels: High humidity is a primary catalyst for mold growth. Ideally, indoor humidity should be kept between 30% and 50%. When levels exceed this range, mold spores can flourish.
Moisture Sources: Water leaks from pipes, roofs, or flooding creates a damp environment conducive to mold. Even minor leaks can lead to extensive mold problems if not addressed promptly.
Poor Ventilation: Areas with limited air circulation, such as basements or attics, are susceptible to mold. Stagnant air allows humidity and moisture to accumulate, providing a perfect breeding ground for mold spores.
Containing the Affected Area
To effectively contain the affected area, you must first identify the flooded zones where mold is likely to thrive.
Next, seal off these spaces to prevent spores from spreading to other parts of your home.
Utilizing containment barriers will further help isolate the contaminated areas during the removal process.
Identify Flooded Zones
When assessing the impact of flooding, pinpointing the affected areas is crucial for effective mold removal. Identifying flooded zones allows you to focus your efforts and ensure that all contaminated areas are addressed promptly.
Using flood zone mapping can help you visualize the extent of the damage and prioritize your remediation strategies.
Here are three key steps to identify flooded zones:
Visual Inspection: Walk through the property and visually inspect each room. Look for water stains, dampness, or mold growth, which indicate areas that have been affected by flooding.
Use Mapping Tools****: Utilize flood zone mapping resources available online or through local authorities. These tools can provide a broader overview of the areas impacted by flooding, allowing you to correlate your findings with historical data.
Consult Professionals: If you’re unsure about the extent of the affected areas, consider hiring mold remediation professionals. They can conduct a thorough assessment and identify hidden zones that mightn’t be immediately visible.
Seal Off Spaces
Sealing off spaces is a critical step in containing the affected area during mold removal after flooding. By implementing space isolation techniques, you can effectively prevent mold spores from spreading to unaffected areas of your home.
Start by closing all doors and windows leading into the contaminated space. Use plastic sheeting to cover openings, ensuring a tight fit to limit airflow. This air sealing helps maintain a controlled environment, essential for effective mold remediation.
Next, consider sealing off vents and ducts. This action prevents mold particles from circulating through your home’s HVAC system, protecting other rooms from contamination. It’s also advisable to turn off your heating or cooling systems to avoid air movement during the remediation process.
If possible, create a negative pressure environment within the affected area. This involves using air scrubbers or fans to draw air out, further enhancing space isolation.
Use Containment Barriers
After sealing off spaces, implementing containment barriers is the next step in effectively managing mold removal. This process helps prevent mold spores from spreading to unaffected areas, ensuring a thorough cleanup.
Using appropriate barrier materials and containment methods is crucial for success.
Here are three key components to consider when establishing containment barriers:
Plastic Sheeting: Use heavy-duty plastic sheeting to cover doorways and windows. This material is essential for isolating the affected area and minimizing airborne spores.
Negative Air Pressure Machines: Employ negative air pressure machines to filter contaminated air. These devices help create a vacuum effect, drawing air through HEPA filters and preventing spores from escaping the contained space.
Duct Tape: Secure all seams of your barrier with duct tape. This ensures that your containment remains intact, further reducing the risk of cross-contamination.
Removing Contaminated Materials
Removing contaminated materials is crucial for preventing further mold growth and ensuring a safe living environment. After flooding, you need to act quickly. First, identify materials that have absorbed water, such as drywall, carpet, and insulation. These are prime candidates for removal since they can harbor mold spores and bacteria.
Use effective removal techniques to carefully detach these materials. For drywall, cut it out at least 12 inches above the waterline to ensure you’re not leaving any damp sections behind. When dealing with carpet, pull it up and roll it carefully to minimize spreading contaminants. Always wear protective gear, including gloves and a mask, to shield yourself from mold exposure.
Once you’ve removed the contaminated items, it’s essential to dispose of them properly. Use disposal methods that comply with local regulations, ensuring you’re not inadvertently spreading mold spores to other areas. Seal the materials in heavy-duty plastic bags before transporting them to a disposal site. This step is vital in maintaining safety for both you and your neighbors.
After you’ve cleared out the contaminated materials, you’ll be one step closer to a mold-free living space. Remember, the goal is to create an environment where you and your loved ones can thrive without the health risks associated with mold growth.
Cleaning and Disinfecting
Cleaning and disinfecting the affected areas is essential for preventing mold from returning after flooding. You need to employ effective cleaning techniques and appropriate disinfecting agents to ensure all surfaces are free from contaminants.
This process not only protects your health but also creates a safe environment for everyone in your space.
Here are three key steps to follow:
Remove Debris: Start by clearing away any remaining debris or contaminated materials that may still be present. Use heavy-duty garbage bags to dispose of these items properly.
Apply Cleaning Solutions: Use a mixture of water and a suitable cleaning agent to scrub surfaces thoroughly. This can include household cleaners, bleach solutions, or other specialized products designed for mold removal.
Make sure to follow the manufacturer’s instructions for dilution and application.
- Disinfect Surfaces: After cleaning, apply a disinfecting agent to all surfaces. This step is crucial, as it eliminates any remaining spores.
Look for EPA-approved disinfectants that are effective against mold. Allow the disinfectant to sit for the recommended time to maximize its effectiveness.
Preventing Future Mold Issues
Preventing future mold issues requires vigilance and proactive measures. To effectively combat mold growth, you need to focus on two critical aspects: humidity control and consistent maintenance of your living environment. High humidity levels can create the perfect breeding ground for mold, so keeping humidity below 60% is essential. Implementing mold prevention strategies will help safeguard your home and ensure a healthier atmosphere for you and your family.
Here’s a concise guide to mold prevention strategies:
| Action | Purpose | Frequency |
|---|---|---|
| Monitor humidity levels | To maintain humidity below 60% | Daily |
| Use dehumidifiers | To reduce moisture in the air | As needed |
| Inspect plumbing | To catch leaks early | Monthly |
| Clean gutters | To prevent water buildup | Biannually |
| Check HVAC systems | To ensure proper airflow | Annually |
Incorporating these practices will not only enhance humidity control but also create an environment where mold struggles to thrive. Regular maintenance and inspections can help you identify potential problem areas before they escalate into significant issues. Remember, mold prevention is a continuous process; staying proactive is key. By fostering a culture of vigilance, you’re not just protecting your home, but you’re also contributing to the wellbeing of everyone who shares your space. Embrace these strategies to build a mold-free environment that promotes health and belonging.
Final Thoughts
In conclusion, tackling mold after flooding is crucial for your health and home. Remember, “an ounce of prevention is worth a pound of cure.” By assessing water damage, identifying mold growth, containing affected areas, removing contaminated materials, and maintaining cleanliness, you can effectively eliminate the problem. Don’t forget to implement preventive measures to keep mold at bay in the future. By staying proactive, you protect your living space and ensure a healthier environment for everyone.